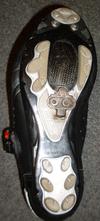
Make power using the pelvic support correctly, not by pushing against the back of the seat.
The RailGun seat is designed to assist in making power using your pelvis as the primary support for your body, so you can make power properly and not by pushing against the seat back. You don't need to engage your upper body when making power, but instead keep :
- the glutes lifted up off of the seatpan (always, as it's easy to do)
- the abdominal muscles relaxed and the pelvis rotated slightly forward
- the upper back relaxed and slightly arched off of the seatback to aid in breathing deeply
- one leg pushing against the other, straight through the cranks for power with the other leg pulling to counter that force.
Don't mash on the pedals, but instead turn smooth circles to make power.
We find it is better to have a delayed power stroke, somewhat similar to what is taught for time trial bikes. Imagine you are looking at your crankset as a clock from the drive side of the bike. Divide the clock into (at least) four segments. Point your toes slightly forward (you may need to move your cleats rearward) and from :
 |
|
Weight the pedals on the downstroke and lift on the upstroke. A substantial amount of weight/force should be on the pedal on the downstroke. Staying on top of the pedals will likely require further development of the required support structures (muscles, tendons and ligaments) and may require a substantial amount of effort and time to develop. I found that riding at low power levels in this manner was more difficult than high and tended to develop the support structures more quickly.
Note that weighting the pedals is not so much for extra power as it is mainly for stability, efficiency and stress reduction. Weighting the pedals tends to keep your body in the correct position to make power much more easily, which makes it easier to maintain your power output.
Remember to use your glutes/hamstrings. The RailGun seat was designed to aid in pulling on the pedals. Work one leg against the other with the pelvis as the connecting point. Think of your legs as connecting rods, your feet as pistons and your pelvis as the crankshaft and crank bearings. You don't need to engage your upper body in this exercise in order to make power. Use the seat to your advantage here.
The more you can pull back to oppose the forward moving pedal at the same time, the greater the stability and gain you will see and the less force and movement will be applied to the seat so less stress there will be on your body. It should be easy to balance the power your quads can produce under almost all conditions if you have trained well to pull on the pedals. If not, pulling will likely require extra training.
To possibly emphasize this, place both hands on a metal handrail, gripping the top and push the handrail away from you with one arm while pulling toward you with the other, pretending to bend the handrail. Then swap which arm is pulling and which is pulling. Don't underestimate how much power one can make by pulling on the pedals when countering the push. Few cyclists ever develop this skill to any substantial level so don't believe those who say it can't be done, just because they never trained to do it. If you believe you can't counter your push muscles with pull, you simply haven't developed your pull muscles enough. It is much easier with low seat angle highracers and especially with the RailGun seat so go for it.
Lock your legs into position and go. Once you have the the seating position and pedal technique down, it's time to lock and go. This requires that you concentrate on relaxing your upper body, rotating your pelvis slightly forward and locking or wedging your legs into a slightly arched position between the top of the pedals (still pointing toes forward) and the pelvic support. You should feel your body stabilize in this position which will make it far easier to maintain a high power output for long periods of time, once the support structures are fully developed. When locked in, your legs should feel comfortably loaded so making power should seem like a natural activity, not one you have to force, though it may take a fair amount of concentration initially.